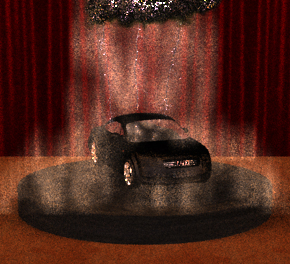
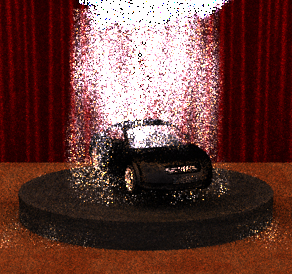
Levitation

Lo Res Hi Res
CS348B - Image Synthesis Final Project
Philip Engstroem and Oren Feinstein
Date submitted: 8 June 2005
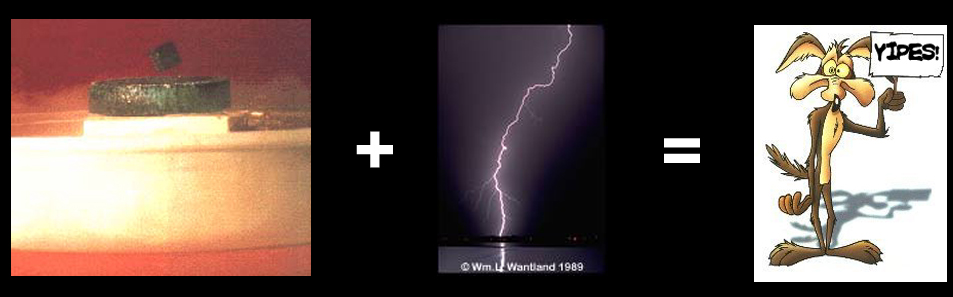
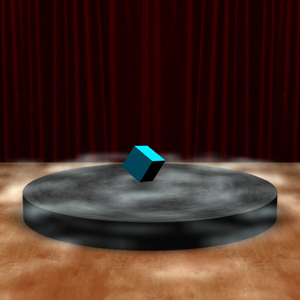
When we first met 3 weeks ago, we both had a general interest in volume rendering and lighting-based effects. Our early idea was to model a bike reflector and shine a flashlight at it with some cool fog. Then, Philip sent me the following image:
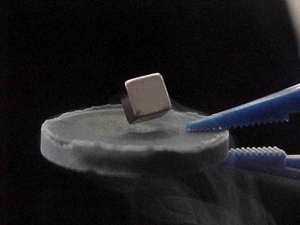
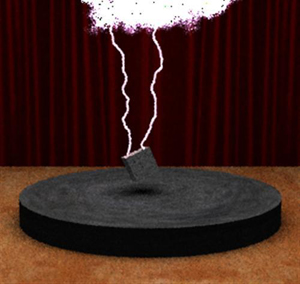
I told him that it was a great idea, but where are the lighting effects? Being creative, I asked Philip what he thought if we were to strike the cube with a bolt of lightning. This was our general reaction:
We proceeded with the project by having a "magic show" theme. We decided to have a stage and red curtain, and we borrowed the cartoon idea of having only one cloud in the sky that strikes lightning on the main object in the scene.
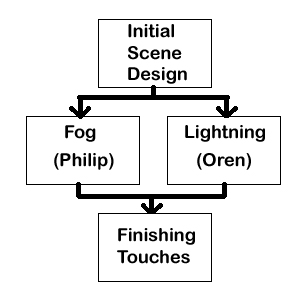
The roadmap below shows how we split the project up. We both worked on the initial design of our scene. Then, we split up to do our respective parts. Finally, we met up to combine our work. We were not expecting the combination to work right out of the box since the lightning emits light and the fog is a participating media, which scatters and absorbs light. We spent a good amount of time optimizing our parameters, but quickly found that in order to see more accurate results, the render times increased significantly, which was painful, but we managed.
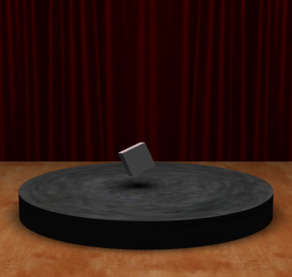
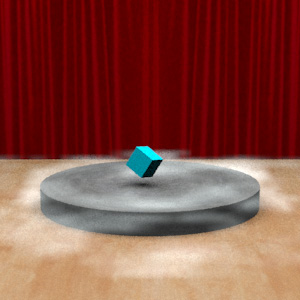
Once we had our idea, we began by creating an initial scene that both of us could work with. We created this initial scene completely in text, i.e. we did not use any modeling programs for this scene. Oren experimented with Blender for a bit, but we decided that pbrt had all that we needed for this initial scene.
The red curtain and the floor are modeled as 2-triangle trianglemeshs. We used texture maps from 3dlinks.com.
The disk used to levitate the cube is essentially pbrt's cylinder and disk. We had to apply the appropriate transforms to position the two shapes. Again, the texture map came from 3dlinks.com. We were lucky to have such a valuable resource for our texture maps.
Finally, the cube took the longest to design in this initial scene. We specified 8 points, and made the appropriate connections using pbrt's trianglemesh. To get the orientation of the cube to be like our photograph, we needed to heuristically select a setting that matched.
First of all, I wanted to work on a problem that would involve Volume Rendering since it is one of my main interests within Computer Graphics. Rendering fog seemed like a reasonable challenge for a two week project. I started by consulting earlier entries to the CS348b Rendering Competition. As fog or smoke is a quite common effect to render, I found several examples, many with quite different approaches. After consulting Ren Ng (the course TA) I knew that I basically had two choices, either to use pbrt's single scatter integrator or implement volume photon mapping. It seemed natural to try out the built in integrator first and only implement the extra horsepower if needed.
After some experimenting with the single scatter integrator, I found that this would be all that I would need, given that I could model the fog in a realistic way. My first idea was to use some sort of Perlin Noise to generate the fog and I began brushing up on the theory. I mainly consulted Ken Perlin's web page www.noisemachine.com.
For the implementation, I decided to reuse the implementation of a volume grid in pbrt (volumegrid.cpp) and change it so that instead of taking an array of density values, it generates them from certain given parameters. I actually started implementing my own noise function before I realized that a function for this already exists in pbrt.
Once the basic structure was up and running, I only had to try and find the right parameters to use. At the beginning, I actually just hard coded my parameters into my volume grid; I changed the frequency in x,y,z individually and also tried using a different number of octaves. I tried generating the fog both based on Cartesian coordinates as well as cylindrical. Eventually, I decided to go with 4 octaves of 3d Perlin Noise with uniform frequencies in x, y and z. I also got the best results when I used cylindrical coordinates. Therefore, the only parameter you can pass to the function is a float for changing the "global frequency" within the volume.
Once I was happy with the fog, I realized that I needed some sort of fall of, since it did not look very much like the fog in our images of levitating objects. I experimented with different functions but finally decided to go with one over an exponential of the radius (from center of disk). I only use this function from the edges of the disk and outwards.
Some of the intermediate fog modeling results:
When the fog was done, I continued adding functionality to my volume grid to enable it to generate volumes with other properties as well. I implemented four "modes": Fog, cloud, glow, and uniform. The cloud mode is basically the fog mode but generated from Cartesian coordinates and without any sort of falloff. The uniform mode is a default mode that creates a uniform volume grid mostly for testing purposes. I implemented the glow mode in accordance with Oren's wish to have some sort of participating media for his lightning to scatter off of. The details follow in the lightning section.
For the lightning bolt, I wanted to learn as much as possible about the physics involved with lightning before I started, so I read a few technical papers: Glassner, Kim and Lin, and Sosorbaram et al. When I spoke with Ren, he told me to consult last year's entry in the competition, but he gave me more valuable information by telling me to look at L-systems. I also looked at wvlightning.com and strikingimages.com for inspiring photographs.
Once I had a clear understanding of what I needed to implement for the lightning, I looked at the pbrt system to understand how I was going to make lightning bolts. I began by looking at the AreaLightSource code found in area.cpp. I saw that there was a reference to a shape, and I figured that I could construct my lightning bolt in the constructor of the area light source since my lightning bolt was a shape that needed to emit light. After a little meandering, I realized that I needed to make a "Shape" plugin and an "AreaLightSource" plugin. The main files that I based my work off of were the unmodified heightfield.cpp and area.cpp. Thus, for my final project, I made a "lightning" area light plugin (lightning.cpp) and a "bolt" shape plugin (bolt.cpp).
Looking at a photo of lightning, the shape appears to be comprised of many lines. However, in reality, these lines are three-dimensional, so I felt that I could use cylinders to generate my bolt. Throughout the design I used a top-down approach; specifically, I constantly asked myself, if I was an artist using my program, what control would I like to have over the lightning. I came up with the following list for my pseudo L-system lightning language:
In bolt.cpp, I use all of the geometrical parameters to systematically build the lightning bolt. Specifically, the constructor makes vectors of transformations for the Refine function to create the cylinders. I start the bolt with the stepped leader, which is translated to the start point specified by the artist. Then, the general algorithm is as follows:
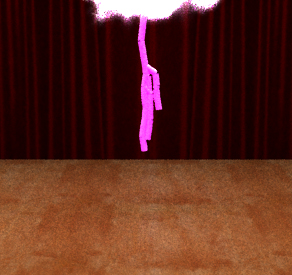
while(!endPoint)Some of the intermediate lightning modeling results:

Once I was satisfied that I had enough artistic control to shape the lightning, I needed to make the light emission of the bolt look more realistic. Here, I attempted a few options: 1) photon mapping 2) make the shape translucent and strategically place point light sources inside 3) place particles with different densities to scatter light. The first method did not work out too well for me (I was getting images as if there was a disco ball in the scene). For the second method, I found that if I place a point light source inside a translucent sphere, the light saturates and the sphere becomes an opaque white.
The third method proved to be the best solution for my specific need. Since Philip had the basic structure for generating volume grids, we decided to collaborate and came up with the idea to create a volume grid, where the density values are set as some function of the distance to the center of a lightning bolt branch segment.
The main issue turned out to be getting the geometric information about the bolts from Oren's part of the code to Philip's. Once that part was solved, the rest was quite straightforward. We simply create a separate volume around each bolt and loop through all the voxels from top to bottom. On each slice, we calculate the position of the lightning bolt at that particular height and then just loop through the voxels of the slice and set their density to a constant over the exponential of the distance times another constant. These two constants can be passed into the custom volume grid as Glow Intensity and Glow Fading Distance and allow the artist to change the brightness of the glow and how quickly the glow decays.
One big problem when manipulating the parameters is that the outcome depends on the number of samples taken and the step size of the volume integrator. This means that in order to get a good understanding of the final result you need to render it in high quality, which takes a lot of time. Of course it is possible only to render a smaller part of the scene, but even this is very time consuming.